|

|
If your machine will not turn on, please try the following in this order:
- Please check that the master switch has been turned on (I = internal battery, II = external battery or AC adaptor) and that you are holding the POWER button for at least 5 seconds.
- If you have an external battery machine, please check if the fuse in the external battery cable has “blown” and replace it if necessary. If you need to purchase a replacement locally (from an electronics store), it’s a 32V 15A fuse.
- If it still won’t turn on, please try charging the battery for at least 1 hour before testing it again (ideally a full 11-hour charge would be desirable). When the charger is connected to the battery it will change the colour of its LED to red indicating that charging has begun. If the charger does not change LED state it means that the battery is not accepting charge which could be because of a blown fuse or an unusable battery. Similarly if the LED status never changes from red(charging) to green(full charge) and the battery also heats up excessively while charging it means the battery is failing to hold charge. More information here.
- If you have an alternative power supply, like an AC Adaptor, please try that and check the outcome.
- Please try plugging your charger in and starting the machine while the charger is charging. Does this make a difference? When using a charger plugged directly into the machine, master switch should be on ‘Internal battery’ position. If the machine comes on but turns off within a few seconds it means that the machine is functional and the battery is the issue.
- When you attempt to turn it on, can you hear any clicking or humming (it might be very faint)? This could indicate the control panel or motherboard needs to be replaced.
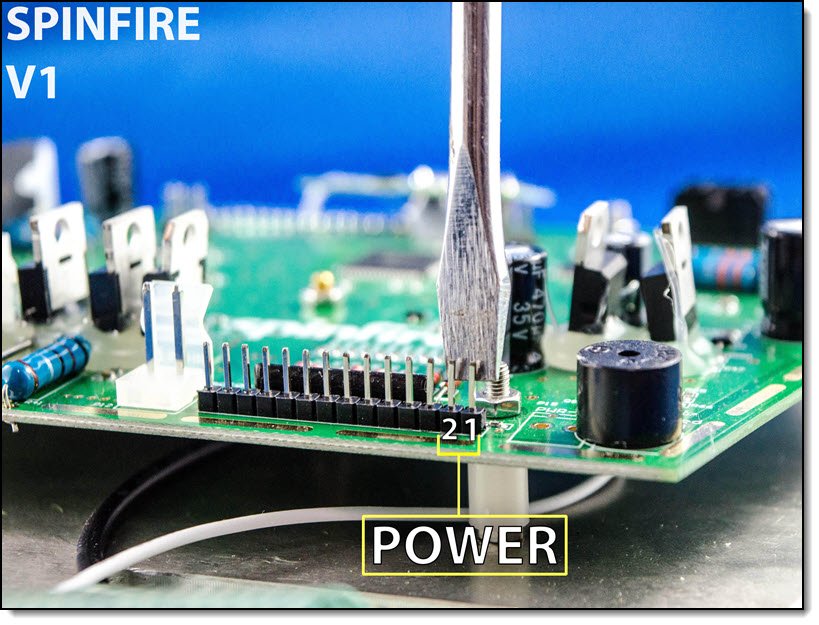
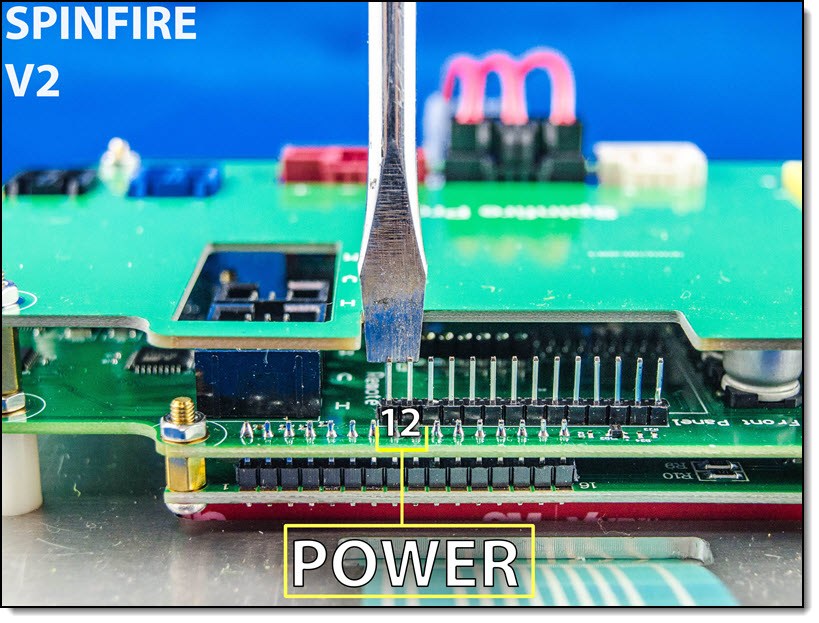
- If you feel comfortable with the process, you can check if the power button on the control panel is the problem by bypassing it. Unscrew the 4 screws on your control panel and pull it out from the purple body. On the back of it, you’ll find the motherboard. There is a large green flat ribbon cable. Please disconnect it. With the power turned on, use a screw driver to touch pins 1 and 2 at the same time to see if the machine turns on (this is very low voltage and no risk of electric shock). Here are photos of how it’s done on the v1 (2020 and earlier) and v2 (2021 an onwards) motherboards:


- If the machine is more than 5 years old or the battery has not been charged once in the past 6 months, it is very possible it is a flat battery. Please contact our distributor about how to replace a new battery.
- It’s possible you may have a faulty master switch or a problem with the wire connections to the master switch. Replacing the master switch and wires may solve the problem.
For further troubleshooting, please contact your local distributor. When contacting us or any of our distributors for support, please ensure that you inform us of all specific details about your machine including the serial number (which is located on the base of your machine, starts with BECXXXXXXXXXX), model & software version (a number shows on LCD when the machine turns on: M-x.x.x, H-x.x.x, V-x.x.x ) as well as a detailed description of the fault. Any videos you can provide us are considered very helpful.


